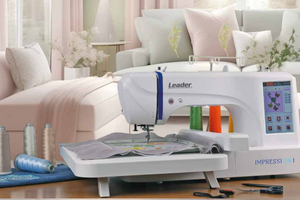
ARTMASTER LE10 - QUESTIONS AND ANSWERS
1. What threads should I use for embroidery?
Compared to regular sewing threads, machine embroidery threads are much stronger and more durable, as the embroidery machine puts a lot of stress on the thread during operation.
Embroidery thread is smoother (impregnated with paraffin) and stronger, with a tighter, double twist than regular sewing thread. This helps prevent breakage, ensuring a neat and professional look for your designs.
Furthermore, embroidery threads reflect more light, adding shine and appeal to designs. Regular sewing threads tend to be dull and less durable, making them unsuitable for embroidery.
The quality of the threads used can significantly impact the final appearance of your embroidery, both in terms of color vibrancy and durability. High-quality threads ensure your designs remain vibrant and beautiful even after repeated washings.
Using low-quality threads can cause problems: breakage, wrinkling, fading.
What is Thread Size? Types of Embroidery ThreadThread thickness is measured in units of linear density. Two units of measurement are used:
- Tex - thread weight in grams per 1000 meters of length (Tex/wT)
- Denie (Den/D) – thread weight in grams per 9000 meters of length
Both units of measurement are non-SI units. For a general understanding of the designations used by thread manufacturers, it's enough to understand that the higher the number, the thinner the thread.
The most commonly used thread thickness for embroidery is 40/120 (the first number is the thickness in Tex, the second is the thickness in Denier).
Polyester thread (polyester)
Polyester thread is the most durable and retains its color even after numerous washes. It's an excellent choice for clothing and items that require frequent washing. Its sheen also gives designs a beautiful, shiny look.
Polyester thread is resistant to shrinkage and stretching, preventing embroidery from becoming misshapen over time. This thread is ideal for children's clothing, kitchen towels, workwear, and other frequently used fabrics.
Viscose (Rayon)
Viscose thread is known for its luster, making it an excellent choice for decorative embroidery. It's often colloquially referred to as "silk," but this is not the case. Viscose thread is semi-synthetic and is a cellulose derivative with the addition of artificial dyes.
This thread has a shiny, silky appearance and beautifully reflects light, adding elegance and sophistication to any embroidery project. Its relative softness and smoothness compared to other threads makes it gentle on fabric, reducing the risk of damage during embroidery.
However, viscose thread is sensitive to high temperatures and moisture, and has a limited lifespan. Over time, it can lose strength, and it's best used on items that aren't washed frequently.
Viscose is great for projects like throw pillows or framed art that don't require regular washing.
Metalized thread
Metallic thread adds an attractive shimmer and shine to designs, making it a popular choice for adding flair and special effects to embroidery projects.
A shiny finish allows the design to stand out, giving it a festive or luxurious look.
However, using metallic threads is associated with certain difficulties. Compared to other types of thread, they are more prone to breakage and fraying, requiring certain "tricks" and special measures—such as using a lower machine speed and special needles.
Machine embroidery also uses cotton threads, which help create the effect of hand embroidery. However, these threads require specialized needles and techniques. The need for such threads is rare.
2. What thread should I use as the bobbin (bottom) thread?
Both specialized threads and regular sewing threads of various sizes can be used as bobbin thread, depending on the type and thickness of the fabric being embroidered. Pre-made disposable bobbins (so-called bobbins) are most often used.
Traditionally, it is believed that the best result on slippery and relatively thick materials is achieved with a combination of polyester as the top thread and regular sewing thread of the same thickness as the bottom.
For embroidery on fine fabrics and monogramming, use 60-gauge threads with fine needles. These are sold on large spools, as well as in ready-to-use disposable bobbins (called bobbins).
3. Which bobbins should I use?
It's easier to say which bobbins cannot be used for machine embroidery.
Steel and perforated bobbins, as well as bobbins without cheeks, cannot be used.
Use the solid duralumin bobbins that come with the machine, as well as bobbins with cardboard cheeks.
4. Which needles should you choose?
Embroidery needles.
The quality of your embroidery depends largely on your choice of needles. It's important to determine which needles are best suited for a given design and for embroidery on a given fabric.
Choosing a needle type
Embroidery machines use DBxK5 needles
Needle sizes
Needles come in different sizes, most of which are marked with two numbers.
For example, 75/11 needles. The first digit is the needle number in the metric system (EU) and corresponds to the diameter of the working part of the needle in hundredths of a millimeter.
Therefore, the 75/11 needle has a working part with a diameter of 0.75 mm.
The second number is the size according to the standard adopted in the USA (EU and US Standards).
Under standard embroidery conditions, needles in the range from 65/9 to 80/12 are used.
Smaller needles are generally used for finer fabrics, finer threads, and designs with smaller details.
Larger needles are generally used for embroidery on coarser and denser fabrics.
Because the holes pierced by this type of needle have a large diameter, the threads experience less friction, which creates a lower risk of thread breakage.
Needle size| Description | |
|---|---|
| 60/8 and 65/9 | The thinnest and are used for fine fabrics and 60-density threads, designs with small details and letters. |
| 70/10 | Used for fine fabrics, designs with fine details, and lettering. Recommended for most embroideries. |
| 75/11 | Standard needle size. Recommended for most embroidery projects. |
| 80/12 | The most common needle size. Often used for cap embroidery. |
| 90/14 | Used with some specialty or metallic threads. |
| 100/16 | Used with thick threads of 12 density. |
Needle tips can also be of two main types - pointed and rounded.
Needles with a pointed tip generally penetrate fabric better, so they are used when working with densely woven and non-woven fabrics.
Ball-point needles are most often used when working with knitted fabrics.
Needles can have different coatings.
Standard needles are silver in color.
Needles coated with titanium nitride have a golden color and their service life is 2-3 times longer than the service life of a standard needle.
5. Non-woven fabrics and other lining materials
When embroidering on most fabrics, it is necessary to use lining materials. In the vast majority of cases, various interlinings are used.
Without interlining, the fabric may shift even if it is tightly clamped in the hoop.
The quality of your embroidery depends on the correct choice of interlining.
It is important to understand that for many embroideries with identical criteria, completely different schemes for using interlining and films can be successfully used.
To achieve consistently high-quality results in embroidery, experience and a willingness to experiment are of great importance.
New products and materials are constantly being developed and introduced into the market.
Find the combinations that work best for you through trial and error.
The interlining is placed on the back side of the fabric on which the embroidery is planned.
Interlining is also sometimes called fabric stabilizer.
Depending on the material, interlinings:
- stabilize the fabric during the embroidery process,
- serve as a support for stitches after embroidery is completed.
Different types of interlining provide different levels of support.
Cut-off interlining
Cut-off interlining is a non-woven material that must be cut from the main fabric after completing the embroidery.
Cut-off interlining is recommended for embroidery on knitted or loosely woven (light) materials that tend to shift and stretch.
The cut-away interlining is also softer to the touch.
If the embroidered area of the garment is expected to be in direct contact with the body, it is recommended to use cut-away interlining, as it will be more pleasant to the body.
As its name suggests, the interfacing should be removed after completing the embroidery by cutting it off with scissors.
It is recommended to leave an edge width of 3 to 6 mm.
Spunbond
A type of cut-off interlining is spunbond.
It has a high density.
Used in cases where high stabilization of the material is required and contact with the body is not expected.
Works well for embroidering chevrons on a border frame.
Tear-away interliningTear-away interlining is a non-woven material that tears easily in any direction and can be easily removed from finished embroidery.
Tear-away interlinings are very lightweight, but their use is limited because they do not stabilize unstable fabrics well.
Fabrics and items that can be used with tear-away interlinings include calico, heavyweight woven shirts, denim, terry cloth, and baseball caps.
Embroiderers love tear-away interlinings for their ease of removal.
The interlining is simply torn off from the main fabric after the embroidery is completed.
This interlining feels like paper to the touch, so if embroidered clothing comes into direct contact with the skin, you may experience discomfort.
One-sided tear-away interlining
One-sided tear-off – a universal type of non-woven fabric.
This interlining tears easily along the main fibers, but poorly across them, which allows it to be used in two layers, placing the tear lines across each layer.
This allows the elastic fabric to be better secured in the hoop.
Interlining with a hot-melt adhesive layer
Adhesive (hot-melt) interlining has a layer (usually dotted) of hot-melt adhesive on one side.
Using an iron or heat press, it is glued to the back of the product.
The interlining is laid on the fabric with an adhesive layer.
To ensure good adhesion of the interlining to the fabric, uniform pressure is required across the entire gluing area, the required temperature, and a certain amount of time for the glue to dissolve.
Heat presses are used for this operation.
This interlining is well suited for embroidery on T-shirts, as it allows you to secure the fabric over the entire surface and eliminate stretching along the edges of the design.
After completing the embroidery, the remaining hot-melt interlining must be carefully torn off from the product.
Use alcohol or special solvents.
Glue residue can cause loops of the upper thread to float above the plane of the design.
Density of non-woven fabric
Non-woven fabrics come in different densities.
Denser (60-80g/m2) linings better stabilize the fabric.
Thinner (35g/m2) linings are less noticeable.
Since choosing the right lining for a particular application requires experience or a series of experimental embroideries, it is recommended that beginning embroiderers begin with medium-weight lining materials.
For thin fabrics, you need to choose thinner materials, while for thick fabrics, you need thicker materials or two layers of thin ones.
Using a lining material that is too thick may cause the embroidery to wrinkle.
The choice of interlining density also depends on the design density that needs to be embroidered.
For embroidery of fine lines and lace designs, you can use a thinner interlining.
When you need to embroider a design with a high density of covering, only thick interlining will do.
After the embroidery is completed, the lining materials can be trimmed or torn off from the back side.
The choice of tear-away or cut-away material depends on the type of product on which the embroidery is being done (baseball caps, emblems, T-shirts, etc.).
The bobbin case is an important part of the shuttle mechanism and therefore requires maintenance and regular replacement.
The average lifespan of a bobbin case when using metal bobbins and 1-shift operation is 3 months.
The bobbin case must ensure that the thread unwinds smoothly and without jerking from the bobbin.
The main reason for uneven thread unwinding is a change in the geometry of the bobbin case, when instead of a round shape, its edges take on an oval shape, which happens when the bobbin case falls on a tiled floor.
Avoid dropping bobbin cases and always check their condition after dropping them.
The release spring must ensure that the bobbin is released to a minimum distance of 0.5 - 0.8 mm from the front of the cap.
Do not allow excessive accumulation of thread trim and frayed threads under the spring; regularly remove the spring with tweezers, check its spring properties, and blow air through the cap.
7. How does the tension of the upper and lower threads affect the quality of embroidery?
- Correctly set thread tension on an embroidery machine reduces breakage.
- Tension settings may vary between threads and machines from different manufacturers, but the basic principles are the same.
- Polyester threads require much greater tension than viscose.
- Colored dyes affect the structure of the fabric, which in turn affects how smoothly the thread runs through the tension elements of the embroidery machine.
- The tension will need to be adjusted if the thread thickness or texture changes.
- The speed of the embroidery machine can affect tension – the lower the speed, the better the quality of the embroidery.
- Tension can be affected by excessive contamination of machine elements with dust along the thread path.
- The correct thread tension on the bobbin case is of primary importance.
If the upper thread tension is too tight, the bobbin thread will show through on the front side of the fabric being embroidered.
If the upper thread tension is too low, the upper thread will throw up loops on the right side of the fabric.
When setting the tension for the first time, stop the embroidery machine and check the thread tension after embroidering about 100 stitches of each color.
Due to different types or thicknesses of fabric, as well as the lining used, the embroidery results may differ from the expected results.
We strongly recommend that you make prototypes before going into mass production.


Normal tension Insufficient tension Too much tension
- Flip the design over to view the back side.
- Make sure the bobbin thread is 1/3 the width of the satin stitch.
- If the bobbin thread is less than or more than 1/3 of the post width, adjust the bobbin thread tension with the adjusting screw.


8. Why do the threads on my machine often break?
Reason #1: Incorrect upper threading
Incorrect threading can cause snags that prevent the thread from moving smoothly along the path, causing it to break.
Reason #2: Bobbin ThreadSince machine embroidery requires both the top and bottom (bobbin) threads to travel unimpeded to "catch" each other and create a stitch, it's important to ensure they are fed through the correct mechanisms.
When you hold the bobbin case in your hand, the bobbin in the case should turn clockwise.
Reason #3: Thread QualityDamaged or old thread can also cause breakage.
Make sure the thread is stored away from sunlight and heat.
Check the thread for twist.
This thread may be old or damaged.
Reason #4: Thread TensionAlong the way, the upper thread passes through tension discs.
The disc springs can be adjusted to high or low tension depending on the type of fabric and the thickness of the thread used.
If the upper thread tension is too tight, the thread will break because too much pressure will be applied to it.
The tighter the thread, the more it stretches, which increases the likelihood of it breaking.
Reason #5: HangnailsBurrs on the needle plate, the shuttle mounting pin, and wear on the ceramic thread guide eyes can also cause thread breakage.
What should I do if the thread is knotted?The "twisting" of a thread is caused by both the properties of the thread and mechanical factors.
Basic:
- Using threads not intended for machine embroidery.
- Low quality thread (poor twist or lack of twist, poor paraffin impregnation, for viscose thread – expired shelf life, or improper storage).
- The needle is dull. Replace the needle.
- Incorrect selection of needle size, type, or sharpening method.
- DBxK5 needles must be used for all types of fabrics, linings and threads.
- For metallic threads, use needles with a larger eye size than for polyester and viscose.
- Needles with a fine spherical tip are suitable for the vast majority of products.
- The needle is not correctly installed in the needle holder.
- The needle must be installed in accordance with the rules (the vertical line is towards you, exactly at a 90-degree angle to the front plane of the machine head).
- No deviations are allowed.
- Burrs on the shuttle mounting pin.
- It is necessary to polish the lug of the mounting pin, or replace the pin.
- Incorrect (too small) gap between the needle and the shuttle nose, or no gap at all.
- Set the clearance in accordance with the manufacturer's recommendations for the type of shuttle device being used.
- Burrs or damage to the metal on the needle plate in the area of the needle hole.
- The hole needs to be polished or the needle plate needs to be replaced.
- The needle does not enter the needle plate through the center of the needle hole, and the thread rubs against the edge of the needle hole.
- It is necessary to adjust the position of the needle relative to the center of the needle hole.
9. What should I do if my machine skips stitches?
- The position and working angles of the shuttle device are incorrectly set. The shuttle device needs to be adjusted.
- Incorrect setting of the extreme lower position of the needle bar (lower "dead point").
- The position of the needle bar needs to be adjusted.
10. What is the role of the compensation spring, where is it located?
The compensation spring (CS) acts as a thread shock absorber when the rotating shuttle pulls in the thread.
There are three types of CP on embroidery machines – two external and one internal.
A weakened CP causes the upper thread to jerk and break more frequently.
An overly tight CP can cause false alarms from the thread break sensors.
Your machine is equipped with an external compensation spring on each needle bar.
For a long time, it will not require any action from you.
However, its spring properties weaken over time, and it may be necessary to adjust the tension upwards.
On your machine, this is done by turning the plastic ring located above the spring clockwise.
11. I'll be using the machine at home. Can I plug it directly into a 220V outlet? Do I need to purchase an uninterruptible power supply or a stabilizer?
Any electronics (except heating devices) are sensitive to voltage fluctuations (surges) in the power supply network.
Neither private nor apartment buildings are insured against this.
A power surge can occur when electricity is interrupted and then immediately restored.
This phenomenon causes too much current to flow through the system.
Power surges can damage your embroidery machine or significantly reduce its trouble-free service life.
Attention! Cheap uninterruptible power supplies (UPS) do not protect against power surges, but only provide the ability to shut down the machine and shut it down.
On the other hand, stabilizers only provide protection against voltage surges, not backup power.
12. What is the purpose of the button with the 100° symbol on my car's display?
A very important button.
Pressing it sets the needle bar that is currently in operation (the active needle bar) to the neutral position (turns it off and returns it to the upper position).
100° is the main shaft rotation angle in degrees at which all needle bars occupy their "home" or upper position.
It is in this position, and only in it, that operations such as changing needle bars (changing colors) and trimming threads are possible.
The machine will not start sewing until its main shaft is set to this position.
In the machine mechanism, this position is determined by a separate sensor.
13. The 100° icon on my machine is crossed out, and the machine won't start. I press the icon, but nothing happens, and a needle position error appears on the screen. What's wrong and how can I fix it?
The second condition for successfully returning the machine's needle bars "home" using the 100° button is that at least one of the needles must be centered in the needle hole of the needle plate (let's call it the "active" needle), and its number must be indicated on the display of your machine.
Only under this condition will the automatic system return the needle bar "home."
What if the automatic system refuses to return the car "home"? What should I do?- remove the needle from the active needle bar;
- press the main shaft drive handle and rotate it counterclockwise;
- set the needle bar to a position where the 100° icon is not crossed out (the needle bar may be in the lower position);
- press the 100° button, and in the menu that appears, press the "Thread Trim" button;
- the needle bar will return "home";
- Turn the power off and on again;
- the machine will automatically make the nearest needle active, and the number of the active needle will be indicated on the display;
- the machine is ready for work.